class.exe

blog.netaka.net

LINEでベクターキャノンを準備してもらう

9/17/2017

この記事を書いてから6年が経っています。内容が古いかもしれません。

LINEのMessaging APIで、ボットにセリフを喋ってもらいます。

ボット用アカウントをつくる

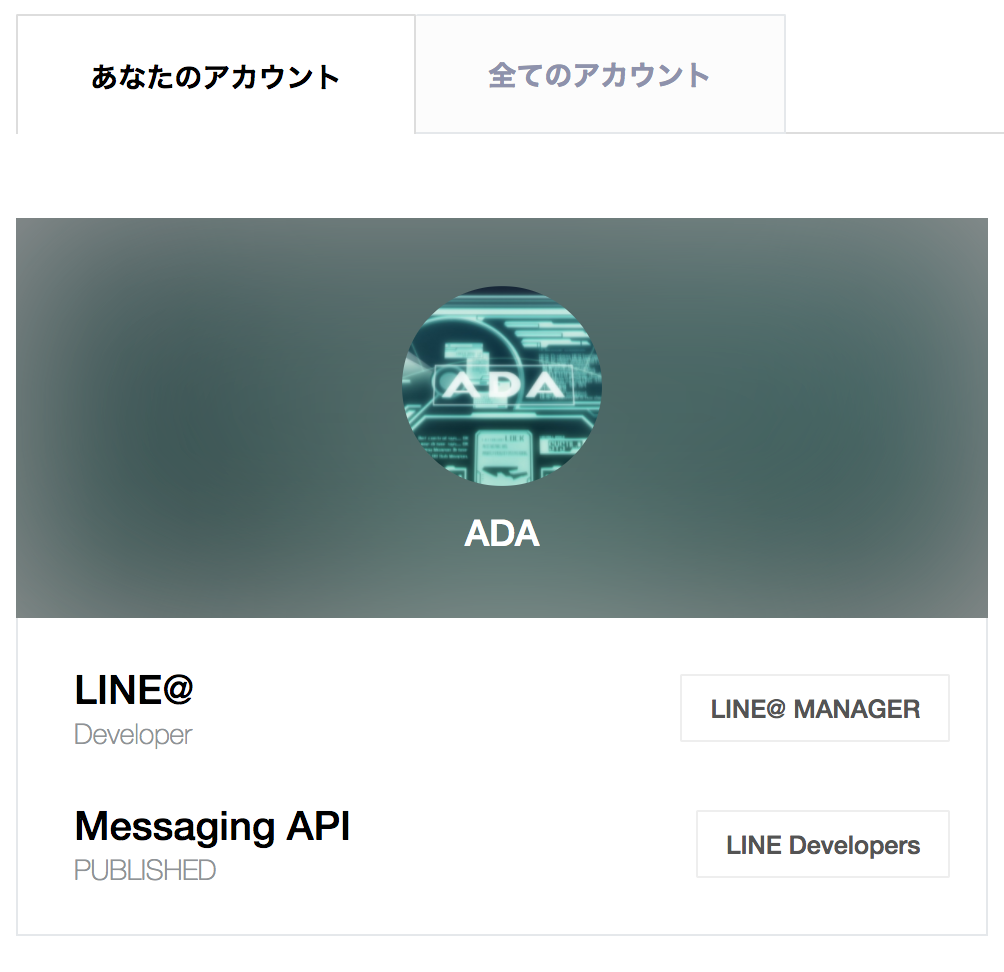
LINE Business Centerでボット用アカウントを作ります。詳しくは割愛しますが、個人用だったのでDeveloper Trialで作っています。

LINE Business Center

bot_account
bot_account

HTTPSが使えるサーバを準備する

Webhook使ってメッセージを受け取るので、HTTPSで受け取れるようなサーバを準備してください。

ボット用のSDKを手に入れて、実装する

便利なSDKがあるのでinstallしましょう。

line/line-bot-sdk-python: SDK of the LINE Messaging API for Python.

Usage:にサンプルがあるので利用します。セリフを喋るためにちょっと手を加えたのがこちらです。

from flask import Flask, request, abort
from dotenv import load_dotenv, find_dotenv
import time
import os

from linebot import (
    LineBotApi, WebhookHandler
)
from linebot.exceptions import (
    InvalidSignatureError
)
from linebot.models import (
    MessageEvent, TextMessage, TextSendMessage,
)

app = Flask(__name__)
load_dotenv(find_dotenv())

line_bot_api = LineBotApi(os.environ.get('CHANNEL_ACCESS_TOKEN'))
handler = WebhookHandler(os.environ.get('CHANNEL_SECRET'))


@app.route("/ada", methods=['POST'])
def callback():
    # get X-Line-Signature header value
    signature = request.headers['X-Line-Signature']

    # get request body as text
    body = request.get_data(as_text=True)
    app.logger.info("Request body: " + body)
    print(body)

    # handle webhook body
    try:
        handler.handle(body, signature)
    except InvalidSignatureError:
        abort(400)

    return 'OK'


@handler.add(MessageEvent, message=TextMessage)
def handle_message(event):
    to = ''
    if event.source.type == 'group':
        to = event.source.group_id
    if event.source.type == 'user':
        to = event.source.user_id
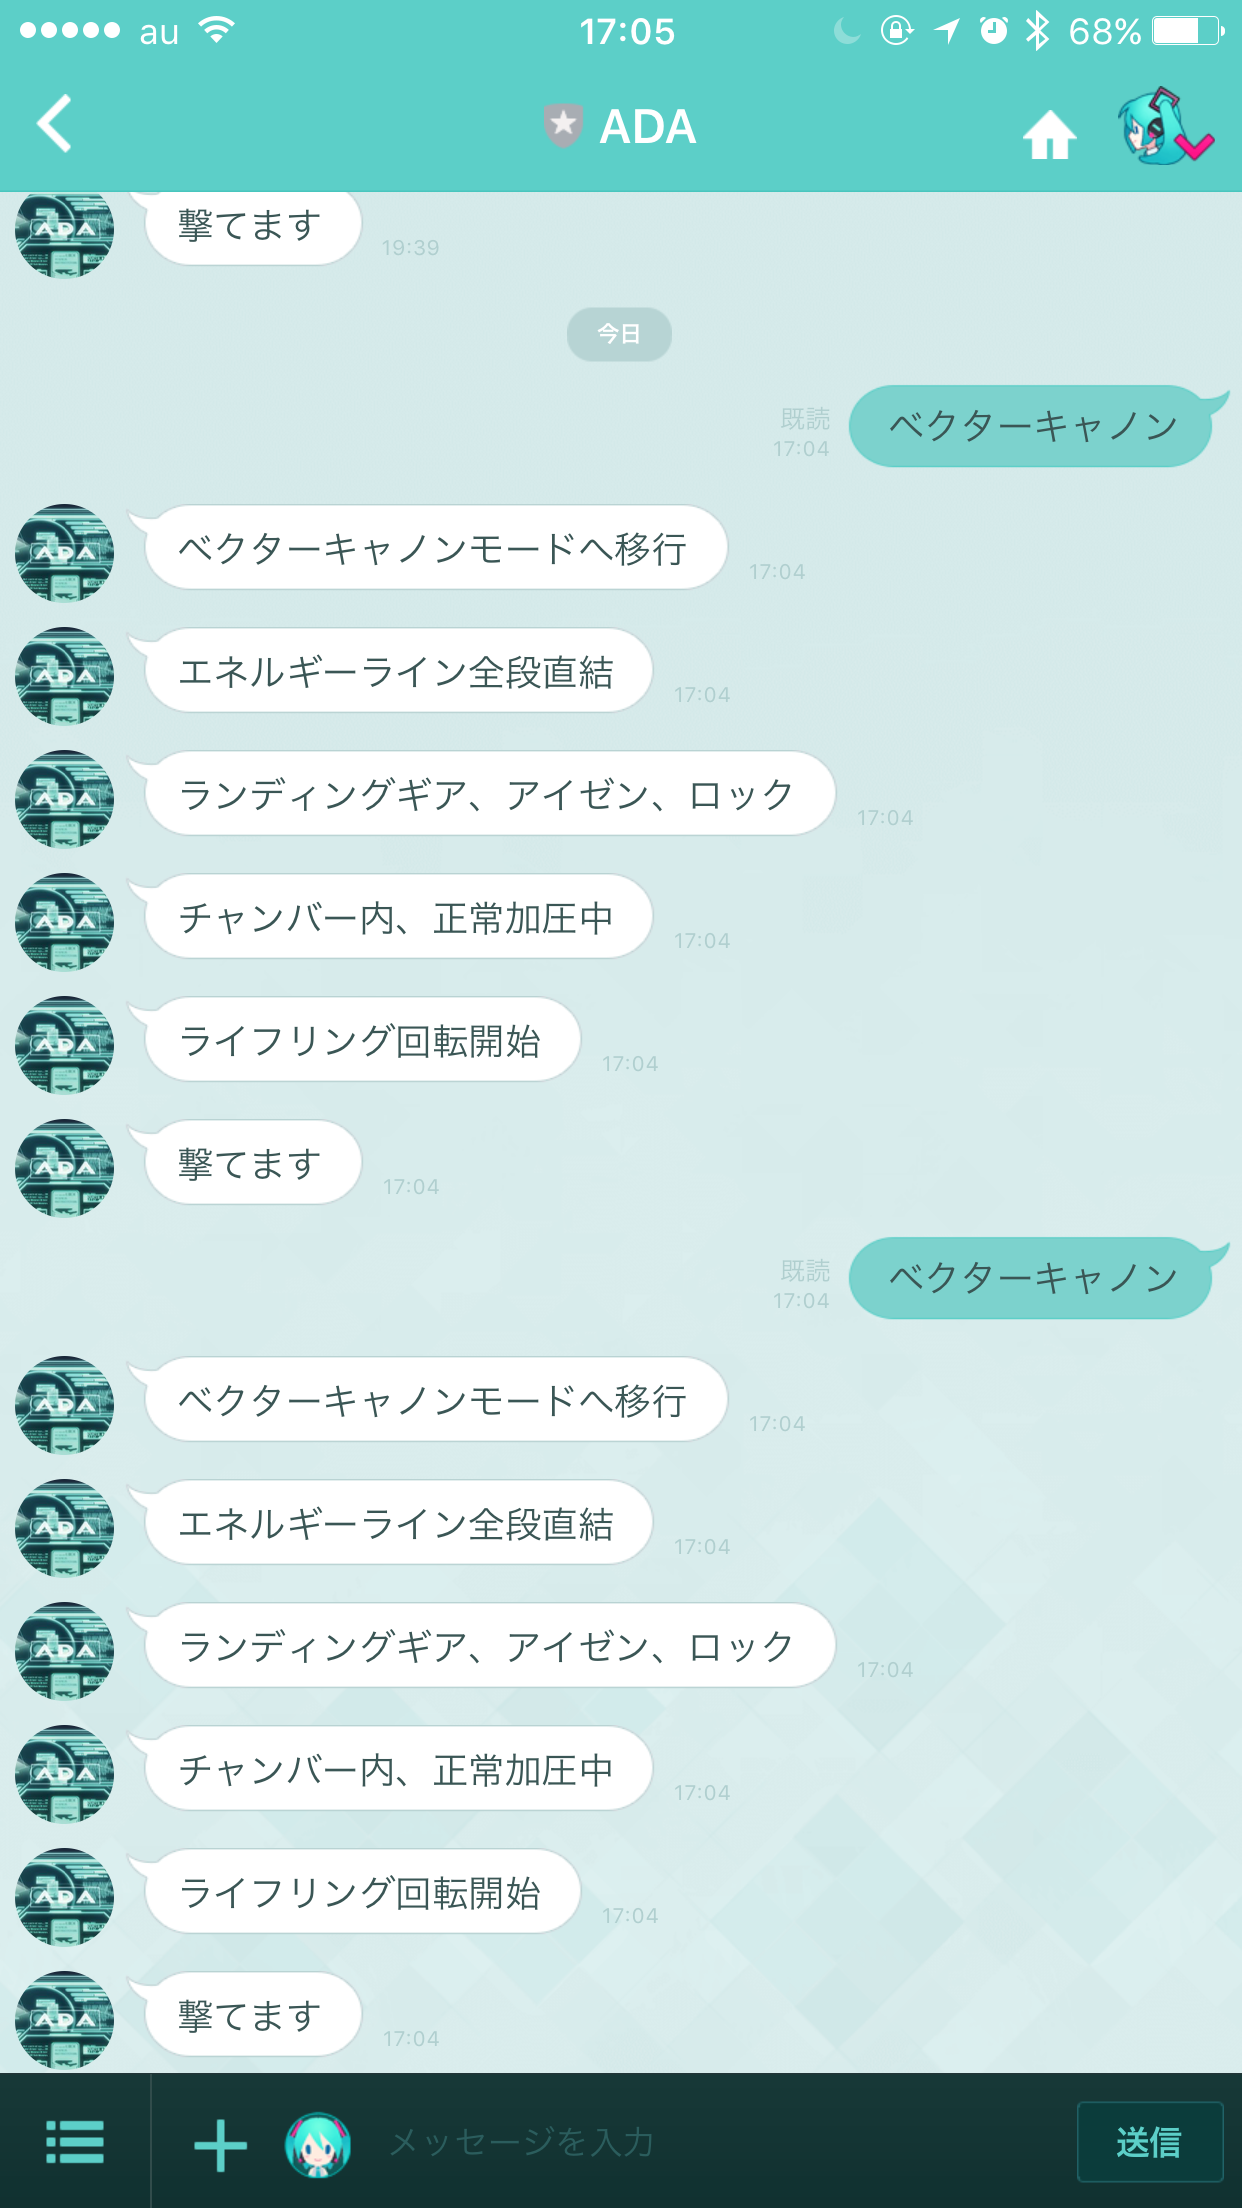
    if event.message.text == "ベクターキャノン":
        line_bot_api.push_message(to, TextSendMessage(text='ベクターキャノンモードへ移行'))
        time.sleep(3)
        line_bot_api.push_message(to, TextSendMessage(text='エネルギーライン全段直結'))
        time.sleep(2)
        line_bot_api.push_message(to, TextSendMessage(text='ランディングギア、アイゼン、ロック'))
        time.sleep(3)
        line_bot_api.push_message(to, TextSendMessage(text='チャンバー内、正常加圧中'))
        time.sleep(2)
        line_bot_api.push_message(to, TextSendMessage(text='ライフリング回転開始'))
        time.sleep(7)
        line_bot_api.push_message(to, TextSendMessage(text='撃てます'))


if __name__ == "__main__":
    app.run()

できました

こちらが「ベクターキャノン」と言うと、ボットは某ゲームのセリフを喋ります。

line_ada_bot
line_ada_bot

Wunderlistの完了タスクをグラフにした

7/30/2017

この記事を書いてから6年が経っています。内容が古いかもしれません。

ToDoリストアプリのWunderlist1から完了タスクを取得してグラフにしてみました。Pythonをつかって、直近7日間の完了タスク数をグラフにしています。

環境は以下の通りです。

$ python -V
Python 2.7.10
$ pip freeze
matplotlib==2.0.0
python-dateutil==2.6.0
pytz==2016.10
requests-oauthlib==0.8.0

手順

  1. アプリを登録して、APIに必要なアクセストークン等を取得する(詳細は割愛)
  2. 全リストのIDを取得
  3. IDから完了タスクを取得
  4. 日付ごとに完了タスクをカウント
  5. matplotlibでグラフ化

コード

# coding:utf-8

import json
from requests_oauthlib import OAuth2Session
from dateutil import parser
from datetime import timedelta, datetime
import matplotlib.pyplot as plt
from pytz import timezone


class Wunderlist:
    def __init__(self):
        self.api = OAuth2Session()
        self.api.headers['X-Client-ID'] = 'your_client_id'
        self.api.headers['X-Access-Token'] = 'your_access_token'

    def fetch_list_id(self):
        req = self.api.get('https://a.wunderlist.com/api/v1/lists',
                           params={})

        if req.status_code != 200:
            print ('Error: %d' % req.status_code)
            return []

        lists = json.loads(req.text)
        id = [l['id'] for l in lists]
        return id

    def fetch_completed_at(self, id):
        req = self.api.get('https://a.wunderlist.com/api/v1/tasks',
                           params={'completed': 'true', 'list_id': id})

        if req.status_code != 200:
            print ("Error: %d" % req.status_code)
            return []

        tasks = json.loads(req.text)
        completed_at = [t['completed_at'] for t in tasks]
        return completed_at

    def fetch_completed_at_all(self):
        list_id = self.fetch_list_id()
        completed_at = []
        for id in list_id:
            completed_at.extend(self.fetch_completed_at(id))
        return completed_at


def make_complete_counts(completed_at, start_date, x):
    dates = [parser.parse(date).astimezone(timezone('Asia/Tokyo')).date() for date in completed_at]
    dates = [date for date in dates if date >= start_date]

    diff_dates = [(date - start_date).days for date in dates]

    result = [diff_dates.count(days) for days in x]
    return result


def make_date_ticks(start_date, x):
    dates = [(start_date + timedelta(days=var)).strftime('%m/%d') for var in x]
    return dates


def main():
    today = datetime.now(timezone('Asia/Tokyo')).date()
    start_date = today - timedelta(days=6)

    wunderlist = Wunderlist()
    completed_at = wunderlist.fetch_completed_at_all()

    x = range(7)
    y = make_complete_counts(completed_at, start_date, x)
    x_ticks = make_date_ticks(start_date, x)

    plt.xkcd()
    plt.bar(x, y)
    plt.xticks(x, x_ticks)
    plt.savefig('wunder_graph.png')


if __name__ == '__main__':
    main()

できました

wunder_graph
wunder_graph

参考ページ

Footnotes

  1. Wunderlist | To-do リスト、リマインダー、タスク管理 - App of the Year!

Pythonでプロフィールの説明を更新する

6/30/2015

この記事を書いてから8年が経っています。内容が古いかもしれません。

Pythonでプロフィールの説明を更新してみました。

以下を参考にしました。

コードはこちらです。別ファイルのtwitter_oauth.pyにOAUTHに必要なトークン等が記載されています。

# -*- coding: utf-8 -*-
from twython import Twython
import twitter_oauth

def update_profile(text):

    twitter = Twython(
        twitter_oauth.CONSUMER_KEY,
        twitter_oauth.CONSUMER_SECRET,
        twitter_oauth.ACCESS_KEY,
        twitter_oauth.ACCESS_SECRET
        )

    twitter.update_profile(description=text)

def main():
    text = 'A long time ago, in a galaxy far, far away...'
    update_profile(text)

if __name__ == '__main__':
    main()

とりあえずこのコードを使って、1日おきにプロフィールの説明を更新するようにしています。

PythonでTwitterのタイムラインを取得する

12/7/2014

この記事を書いてから9年が経っています。内容が古いかもしれません。

PythonでTwitterのタイムラインを取得してみました。

以下を参考にしました。

コードはこちらです。別ファイルのtwitter_oauth.pyにOAUTHに必要なトークン等が記載されています。

# -*- coding: utf-8 -*-
from twython import Twython
import twitter_oauth

def get_timeline(user, num):
    twitter = Twython(
        twitter_oauth.CONSUMER_KEY,
        twitter_oauth.CONSUMER_SECRET,
        twitter_oauth.ACCESS_KEY,
        twitter_oauth.ACCESS_SECRET
    )

    timeline = twitter.get_user_timeline(user_id=user, count=num)
    return timeline

def main():
    user = 'netaka'
    timeline = get_timeline(user, 10)
    for tweet in timeline:
        print tweet['text']

if __name__ == '__main__':
    main()

取得できるツイート件数のデフォルトは20件のようなのでご注意ください。

Pythonでツイートを投稿する

12/7/2014

この記事を書いてから9年が経っています。内容が古いかもしれません。

Pythonでツイートを投稿してみました。

以下を参考にしました。

コードはこちらです。別ファイルのtwitter_oauth.pyにOAUTHに必要なトークン等が記載されています。

# -*- coding: utf-8 -*-
from twython import Twython
import twitter_oauth

def post_tweet(text):
    twitter = Twython(
        twitter_oauth.CONSUMER_KEY,
        twitter_oauth.CONSUMER_SECRET,
        twitter_oauth.ACCESS_KEY,
        twitter_oauth.ACCESS_SECRET
    )

    twitter.update_status(status=text)

def main():
    text = "にゃんぱすー"
    post_tweet(text)

if __name__ == '__main__':
    main()

簡単にツイートできて便利ですね。

PythonでTwitterのリプライを取得する

12/2/2014

この記事を書いてから9年が経っています。内容が古いかもしれません。

PythonでTwitterのリプライを取得してみました。

以下を参考にしました。

コードはこちらです。別ファイルのtwitter_oauth.pyにOAUTHに必要なトークン等が記載されています。

# -*- coding: utf-8 -*-
from twython import Twython
import twitter_oauth

def get_mentions(status_id):

    twitter = Twython(
        twitter_oauth.CONSUMER_KEY,
        twitter_oauth.CONSUMER_SECRET,
        twitter_oauth.ACCESS_KEY,
        twitter_oauth.ACCESS_SECRET
    )

    mentions = twitter.get_mentions_timeline(count=200, since_id=status_id)

    return mentions

def get_reply(status_id):

    mentions = get_mentions(status_id)
    result = ""
    for mention in mentions:
        if mention['in_reply_to_status_id'] == status_id:
            result = mention['text']

    return result

def main():
    print get_reply(534338621193474048)

if __name__ == '__main__':
    main()

get_reply(status_id)は取得できる200件のmentionのうち、指定したステータスIDの一番古いリプライを返すはずです。実行結果は以下な感じです。

$ python reply_twitter.py
@netaka ねたか ずっと探してたのよ

Pythonでプロフィール画像を更新する

11/26/2014

この記事を書いてから9年が経っています。内容が古いかもしれません。

Pythonでプロフィール画像を更新してみました。

以下を参考にしました。

コードはこちらです。別ファイルのtwitter_oauth.pyにOAUTHに必要なトークン等が記載されています。

# -*- coding: utf-8 -*-
from twython import Twython
import twitter_oauth
import base64

def update_profile_image(filename):
    file = open(filename, 'rt').read()
    enc_image = base64.b64encode(file)

    twitter = Twython(
        twitter_oauth.CONSUMER_KEY,
        twitter_oauth.CONSUMER_SECRET,
        twitter_oauth.ACCESS_KEY,
        twitter_oauth.ACCESS_SECRET
    )

    twitter.update_profile_image(image=enc_image)

def main():
    filename = './kuro.png'
    update_profile_image(filename)

if __name__ == '__main__':
    main()

base64エンコード、めっちゃ楽ですね。とりあえずこのコードを使って、3時間おきにプロフィール画像を更新するようにしています。

Pythonで埋め込みツイートを取得する

11/24/2014

この記事を書いてから9年が経っています。内容が古いかもしれません。

Pythonで指定したステータスIDから埋め込みツイートを取得してみました。

以下を参考に取得しています。

コードはこちらです。別ファイルのtwitter_oauth.pyにOAUTHに必要なトークン等が記載されています。

# -*- coding: utf-8 -*-
from twython import Twython
import twitter_oauth

def get_embed_tweet(embed_id):
    twitter = Twython(
        twitter_oauth.CONSUMER_KEY,
        twitter_oauth.CONSUMER_SECRET,
        twitter_oauth.ACCESS_KEY,
        twitter_oauth.ACCESS_SECRET
    )

    embed = twitter.get_oembed_tweet(id=embed_id)

    if embed.has_key('html'):
        return embed['html']

    return ""

def main():
    id = 536174907856404481
    print get_embed_tweet(id)

if __name__ == '__main__':
    main()

取得した埋め込みツイートはこちらです。

PythonでTwitterにツイート

8/6/2013

この記事を書いてから10年が経っています。内容が古いかもしれません。

python-twitterでTwitterにツイートしていましたが、動かなくなっていました。

python-twitterではなく、twythonならツイート出来ました。 Python-twitterをつかったTwitter API 1.1のツイート取得と投稿 - VivoWiki こちらも試しましたがうまくいかず。環境はさくらVPSです。